Step by step instructions on how to configure, boot and connect to a Raspberry Pi that has no attached mouse, keyboard or monitor.
The Plan
- Download and write an image of Raspberry Pi OS to the SD card from a normal PC/Laptop
- Put the newly written SD card in to the Raspberry Pi and power it up
- Remotely connect to the Raspberry Pi from the PC/Laptop and complete the setup
What you’ll need
- Either WiFi or Ethernet local area network (LAN) that has access to the internet
- Existing PC/Laptop connected to the LAN above
- SD card reader/writer on the PC/Laptop
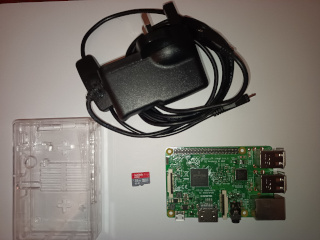
- Micro SD Card of at least 8 GB size
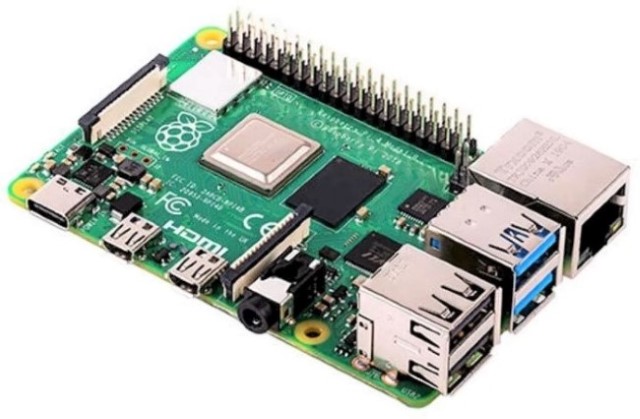
- Raspberry Pi
- Power Supply for the Raspberry Pi
- Case for the Raspberry Pi (Optional)
Download & Write an OS to the SD Card
The simplest way to accomplish this is to use the “Raspberry pi Imager” application from the foundations own website: https://www.raspberrypi.com/software/
It is available for all operating systems and operates exactly the same on all of them. It combines all the following operations in to a single process:
- Select an OS image to download (there are many to choose from)
- Pre-configure the image to:
- Set the hostname to whatever you wish
- Enable SSH so that you can login from another machine
- Set an initial username and password to login
- Configure WiFi connectivity
- Set the time zone and keyboard layout to be used
- Select the SD card or USB device to write the image to
- Download the specified image and write it directly to the specified SD card or USB device
- Verify that the newly created SD/USB image did not get corrupted during download
1. Choose an Operating System (OS)
Which image you should choose depends upon a couple of things:
- If you have a Pi 1, Pi 2, Pi Zero or Pi Zero W then you MUST choose one of the 32 bit OS options. If you have a Pi 3, Pi 4, Pi Zero 2 or Pi Zero 2 W then you CAN choose a 64 bit OS option. If you have a Pi 5 then you MUST choose a 64 bit OS.
- If you want to use a graphical (Windows like) interface, then you should choose one of “with Desktop” OS options. Otherwise you can choose one of the “without Desktop” (Lite) OS options to save memory usage.
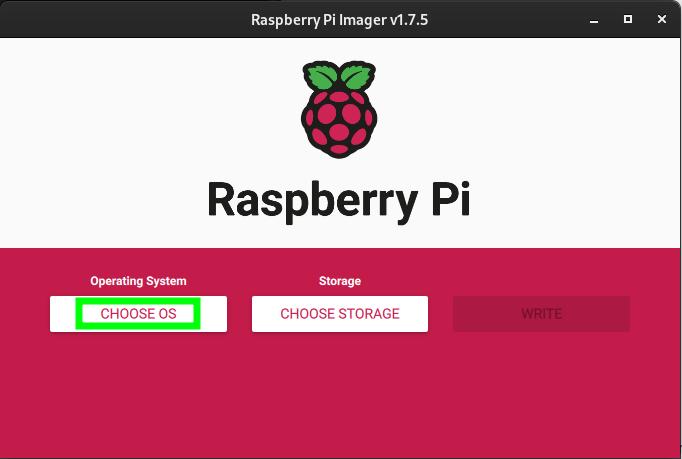
OK. Now click on the “CHOOSE OS” button and you will be presented with the following screen:
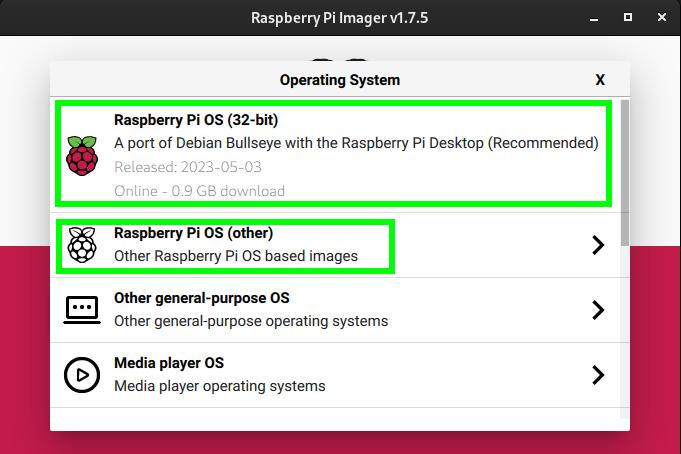
If you are unsure what you need then choose the top option on this page “Raspberry Pi OS (32 bit)” [unless you have a Pi 5 when you MUST choose one of the 64 bit OS‘s]. It will run on any model of Raspberry Pi (except for the Pi 5) and includes a desktop GUI environment. It saves on size by only including a minimal set of applications. That said it probably has everything that you want, and if it doesn’t then you can simply install what you want once the setup is completed. If you chose this option, skip ahead to the next section “2. Pre-Configure the image“.
Otherwise you can select the second option “Raspberry Pi OS (Other)”. This will update the options to show a screen similar to the following:
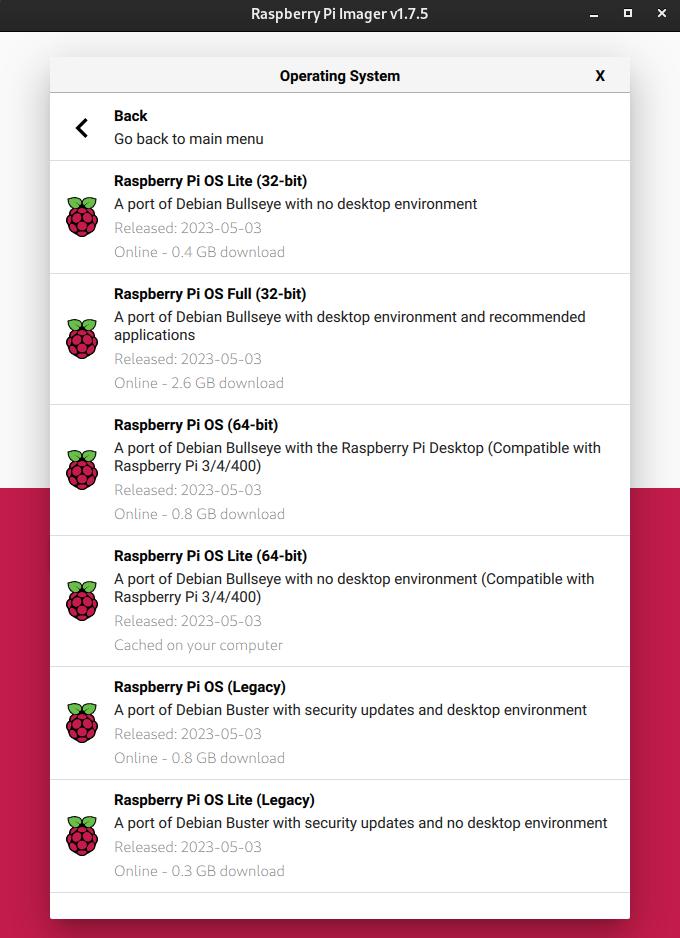
There are quite a few options on this new list. How many you see without scrolling will depend on how large you have the window set. I have enlarged the window enough to see all the options at once. However, by default you will likely just see the top two or three options, and will need to scroll down to see the rest of the list.
The available options are:
- Raspberry Pi OS Lite (32 bit) – This option does NOT include a desktop (windowing GUI) environment. It will work on any model except for the Pi 5, however, it is primarily for Pi 1, Pi 2, and Pi Zero variants that are being run headless (without an attached keyboard, mouse, and monitor).
- Raspberry Pi OS Full (32 bit) – This option DOES include a desktop (windowing GUI) environment. It differs from the similarly named option on the previous screen: “Raspberry Pi OS (32 bit)”, by pre-installing a larger range of desktop applications. Like the previous option it will work on any model (except for the Pi 5). However, this is likely NOT the option you want if you are running headless (unless you intend to use something like VNC to access it).
- Raspberry Pi OS (64 bit) – This is the 64 bit version of what you saw on the first page of OS options. It includes a desktop (windowing GUI) environment and a carefully curated set of minimal desktop applications. It is likely NOT what you want if you are running headless (again, unless you intend to use something similar to VNC to remotely manage it).
- Raspberry Pi OS Lite (64 bit) – This is most likely what you want. It does NOT have a desktop (windowing GUI) environment and can only communicate via terminal commands (both remotely and locally).
- Finally the last two options offer “Legacy” versions of the 32 bit OS. Unless you have a specialised use-case, this is probably NOT what you want.
Choose whichever version is most appropriate to your needs and that will take you to a screen similar to below (I chose the 64 bit Lite OS as that is the most common for headless server scenarios). As we move on to the next section to pre-configure the image prior to inserting in the Pi.
2. Pre-Configure the image
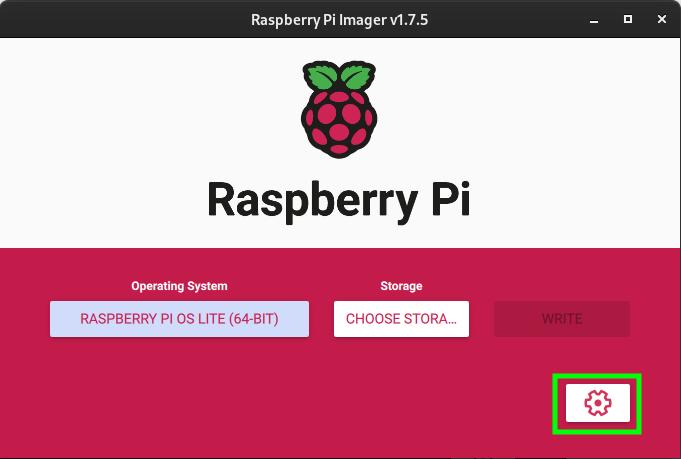
It’s now time to pre-configure your chosen image before writing it to SD card. To do this either click on the “gear” icon ![]() or hold down the “Ctrl + Shift” keys while pressing “X”. Either of these actions will present the following screen:
or hold down the “Ctrl + Shift” keys while pressing “X”. Either of these actions will present the following screen:
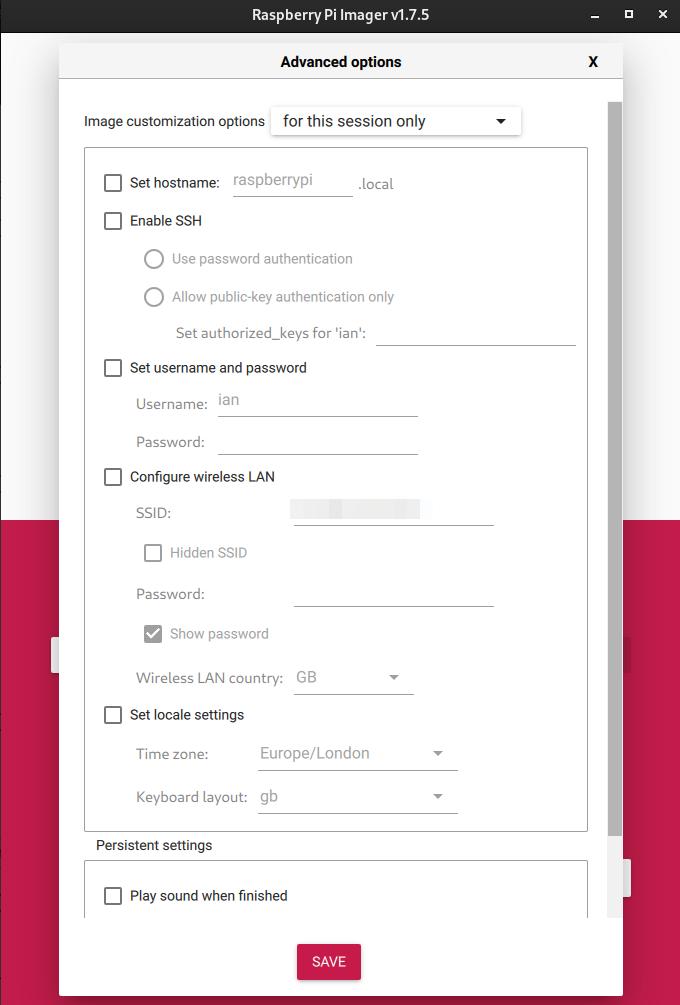
As in one of the previous screen captures I have adjusted my window size so that all the important settings are visible. However, by default you will likely only something like “Set hostname” and “Enable SSH” options without scrolling.
Set hostname:
By default, this will get set to “raspberrypi”. Best practice is to change this to something else for security reasons.
Basically, computer security takes on a layered approach. Lot’s of small obstacles layered one on top of the other. Each one making it slightly more challenging for any would be malicious actor (an intruder breaking in to your network).
Select the checkbox and give your Pi it’s own unique name that is meaningful and memorable to you.
People often choose a theme and name all devices on their network according to that theme. For example, you could have the theme as “Marvel Cinematic Universe” and name all your devices after superheroes from that universe; alternatively you might choose the theme to be “Geographic Locations” and name all your devices after towns and cities. I’m sure that you get the idea.
Enable SSH
Since the objective of this installation is to create a headless Raspberry Pi. It will have no monitor, mouse, or keyboard attached to it. So you will likely want to login to it remotely from another device that does have those things. You could plug them in each time you want to do something, but that seems like an awful lot of hassle.
To login remotely you will use a secure protocol called SSH (which stands for secure shell) which allows a terminal on one computer to work as if it is attached directly to another computer on the same network. It’s actually so much more than that, but this grossly simplified explanation will do for here.
Select the “Enable SSH” checkbox and then select the “Use password authentication” radio button. Public key authentication could be setup instead, but that is beyond the scope of this “How To” post.
Scrolling down the next thing to configure is:
Set username and password
By default these were traditionally set a username of “pi” and a password of “raspberry”. However, that is extremely bad practice as this user will have superuser privileges. Remember from earlier that security is a layers game. Not using default usernames and passwords is just another simple layer.
Choose a short username for yourself (must be all lowercase letters) and a memorable, but non-trivial password for yourself.
While general password advice is to use random sequences of upper/lower case character combined with numbers and symbols. There is a necessary practical compromise here, as you will not only need to type it in each time you login, but also every time you want to start using the “sudo” command. Thus it needs to be complex enough that nobody is likely to guess it, but memorable enough that you can easily use it frequently.
Continuing to scroll down we get to the WiFi section
Configure wireless LAN
If you will be using a wireless network connection rather than wired Ethernet then select the “Configure wireless LAN” checkbox and fill in the “SSID” and “Password” needed to logon to your WiFi.
If you will not be utilising a WiFi connection then leave the checkbox unchecked and skip on to the next section to “Set locale settings”.
Set locale settings
Select the “Set locale settings” checkbox and choose the time zone and keyboard layout that are appropriate for where your device will live.
We’re almost there. Scroll down to the end to find and click the save button!
3. Choose Storage Location
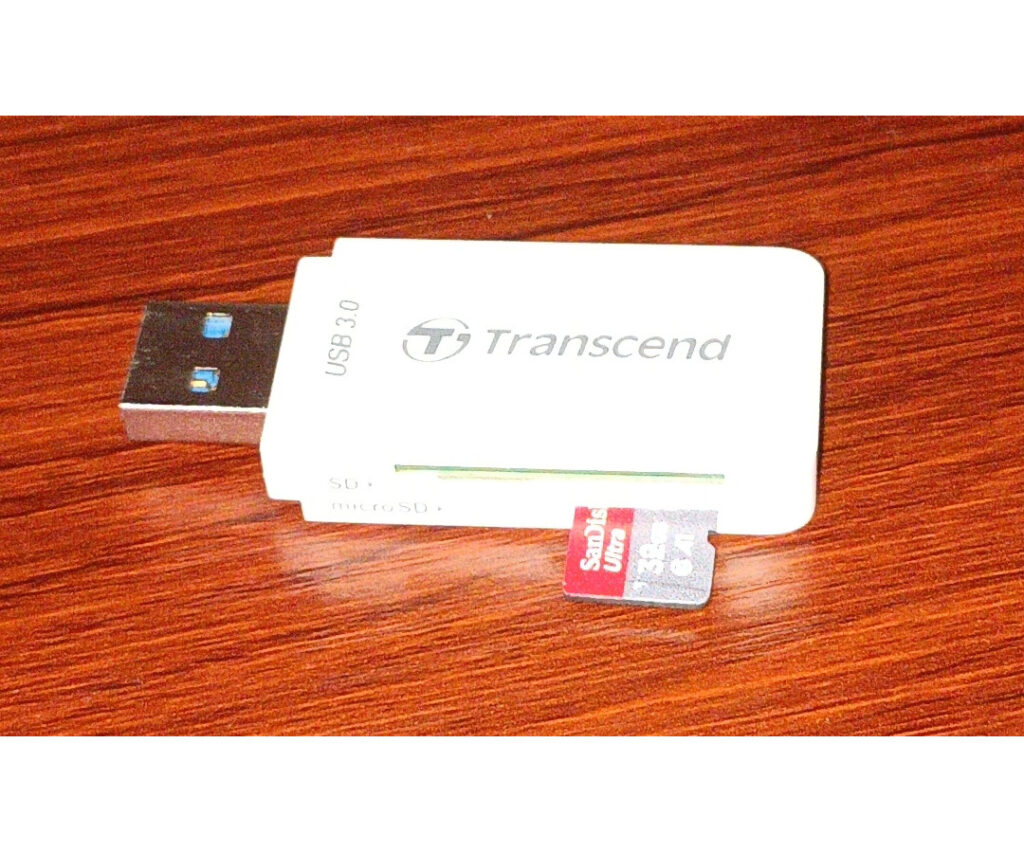
Put the SD card in to your card reader/writer and plug it in to the PC that you are using.
Then in your Raspberry Pi Imager screen Click on the “CHOOSE STORA…” button

Which will take you to a screen similar to below:
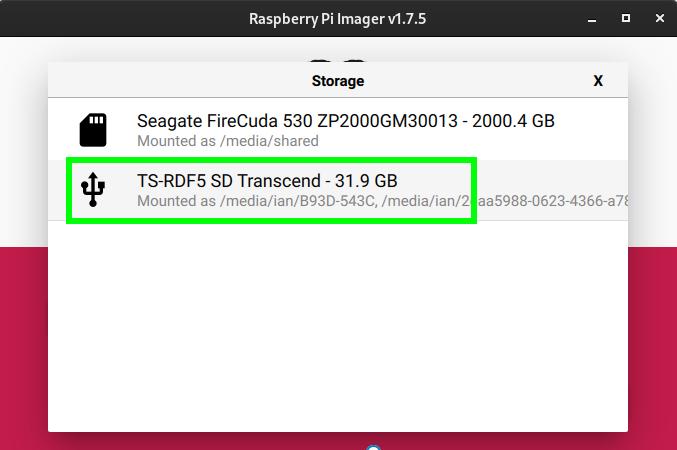
and carefully select your SD card device from the list.
If you have multiple devices showing (as I do here), check the name and size of each device to help narrow it down to the correct one. In my case it is the “TS-RDF5 SD Transcend – 31.9 GB” option. I know this because “Transcend” is the manufacturer of the SD card reader that I plugged in to a USB socket, and the SD card in it is 32 GB in size. I definitely won’t want to select my 2 TB SSD by mistake 🙁
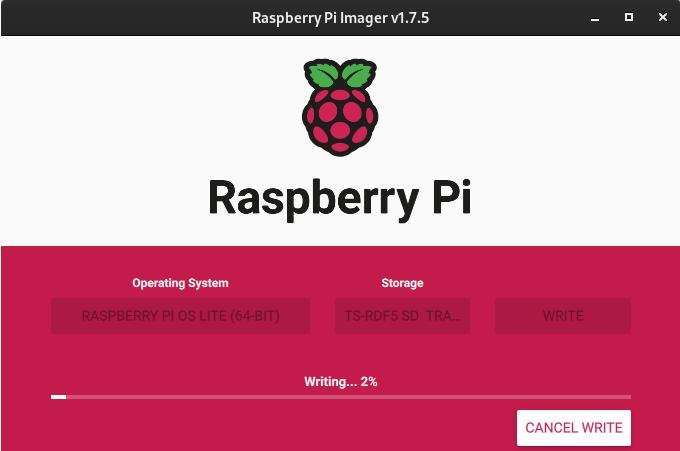
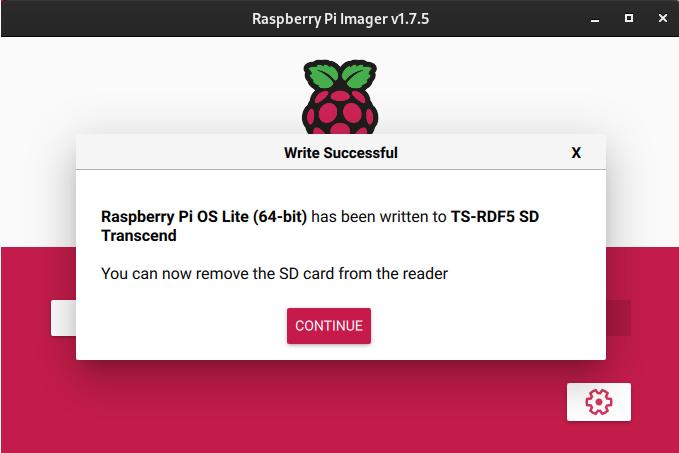
You will be asked to confirm that everything on the selected SD card will be overwritten, then you will get a progress screen while the image is first written, and then the resulting image verified.
Finally when the operation is complete you will be asked to remove the SD card from the machine.
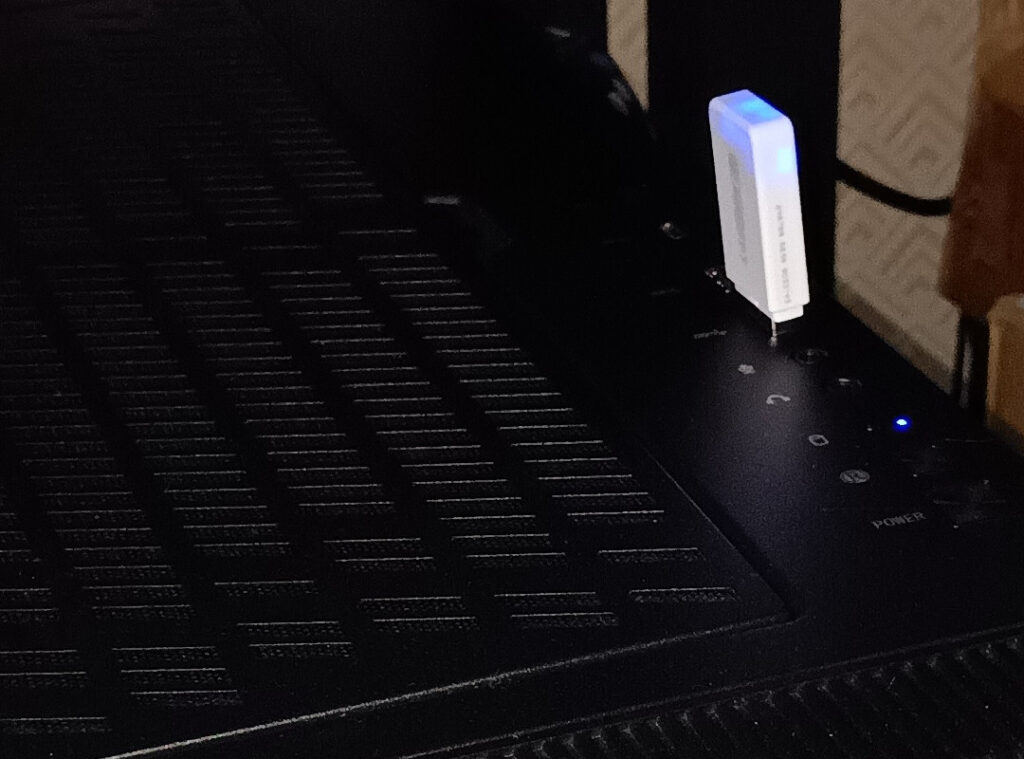
Powering up the Raspberry Pi
Plug the newly prepared SD card in to the Pi (be sure to orient it with the contacts facing the circuit board) and power it up. The red LED should glow constantly and the green LED will flash intermittently, indicating that everything is normal and the Pi is booting up. After a while the green LED will stop flashing, indicating that the boot process is completed.
Remote connect & complete the setup
With the Pi powered up and the initial boot sequence having completed. It’s now time to remotely login to the device from your PC/Laptop using SSH from a command line.
First off go to your PC/Laptop and open up a command line terminal window. How you do this will depend upon what operating system you have.
-
Windows
-
Apple
-
Linux Gnome
-
Linux KDE
-
Linux Fedora
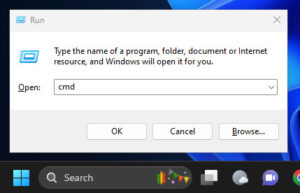
Hold down the ![]() +
+ ![]() keys. Then in the dialog box that opens type in “cmd” and press the “Run” button:
keys. Then in the dialog box that opens type in “cmd” and press the “Run” button:
Hold down the ![]() keys, then type “terminal.app” in to the search bar when it pops up. Then either select the Terminal.app icon or just hit return to open the terminal window.
keys, then type “terminal.app” in to the search bar when it pops up. Then either select the Terminal.app icon or just hit return to open the terminal window.
Unfortunately I don’t have access to a mac to test the above instructions. They are just what I gleaned from a google search.
On Linux Gnome desktop hold down the ![]() +
+![]() keys to directly open a new terminal window.
keys to directly open a new terminal window.
On Linux KDE desktop hold down the ![]() +
+![]() keys to directly open a new terminal window.
keys to directly open a new terminal window.
In Fedora hold down the ![]() +
+![]() keys to directly open up a new terminal window.
keys to directly open up a new terminal window.
Which ever type of system you are using you should now have an open command line terminal similar to the screenshot below taken on a Debian Linux system (though your prompt will vary depending on your OS):
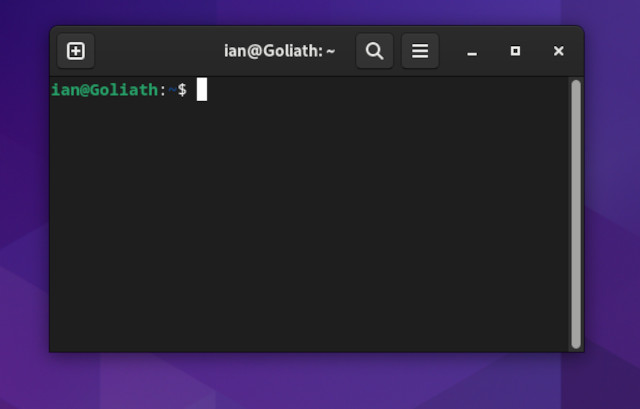
From this window an SSH session can be established to the remote Raspberry Pi, which can then be controlled from here just as if your keyboard and terminal window were directly attached to it.
The syntax for the command will be:
ssh username@hostname.localWhere “username” and “hostname” are replaced by whatever names you setup while preparing the SD card.
So for example I used a username of “ian” and left the hostname to default to “raspberrypi” so I would type the following in to my termal:
ssh ian@raspberrypi.localThis should yield a result similar to one of the below screen captures:
If you get an error message along the lines of “Could not resolve hostname“, then try the same command again, but this time without “.local” on the end (which is how my network requires it to be).
ssh ian@raspberrypiIf that still doesn’t work the next thing you could try is pinging the device by using the command:
ping -a raspberrypi.localor
ping -a raspberrypiThe result that you are seeking will be similar to below. Note that although we used the hostname to initiate the ping, if it is known it will tell you the actual IP address that the Raspberry Pi has been allocated.
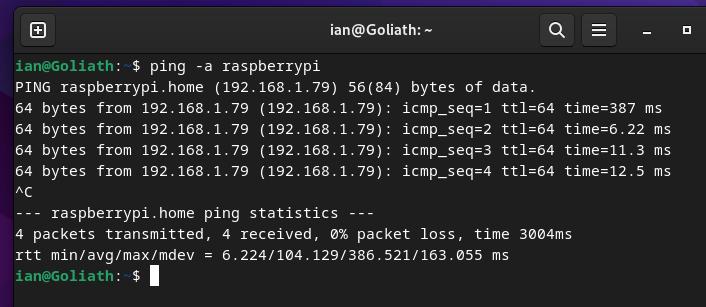
If you are still getting the same error you may need to look in your router’s management settings to find out what IP address has been allocated to your Pi, and use that IP address instead of the hostname.
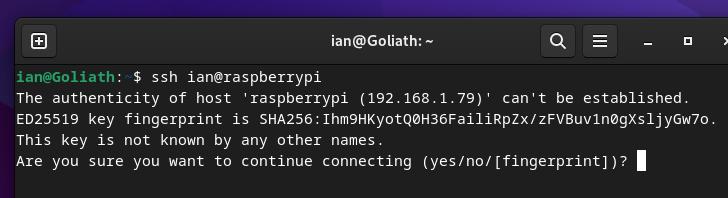
Hopefully, what you are presented with next will be a prompt to accept an unknown SHA256 fingerprint, to which you MUST respond “yes”;
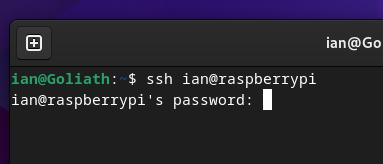
Next you will be prompted to enter the password for the user that you are logging in as;
Finally, you should see a few details about the system that you have logged in to and a command prompt. Below is a screenshot of the above transaction performed from my Debian Linux system.
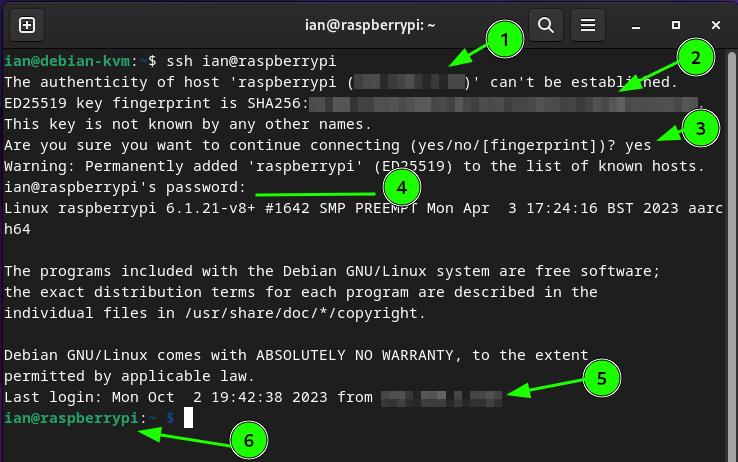
The numbers overlaid on the screenshot have been added so that I can briefly explain what is on the screen:
- This blurred out field is where the actual IP address of the device that you are trying to connect to (the Raspberry Pi in this case).
- This blurred out field is where the SHA256 fingerprint of the device be connected to is displayed. It is warning you that you have never connected to this device before and is checking that you didn’t accidentally mistype the connection string.
- You are being asked to explicitly confirm (by typing “yes”) that you really do wish to connect to this unknown device. Anything other than a “yes” will result in the connection being aborted.
Note that on subsequent connection attempts items 1, 2, and 3 will not occur as the device will be known. - This is where you are prompted to enter the password for the user that you are logging in as.
- This blurred out field displays the IP address of the terminal that you connecting from (your PC/Laptop in this case).
- This is the command prompt that is displayed for this user. By default it is showing the logged in username followed by the hostname of the Raspberry Pi. Following the colon is the relative path of the current directory from the users home directory (denoted by a “~” character), a space, and then finally the “$” character. The “$” indicates that the user does NOT have root privileges. Had the user been given root privileges, it would have been a “#” character.
Congratulations! You are now successfully remotely logged in to your Raspberry Pi.
Next job is to make sure that the system is fully up to date as there will usually have been many updates released since the image that you downloaded was first created. This is a very simple matter and is accomplished by typing the following command at your command prompt from above:
sudo apt update && sudo apt full-upgrade -yThis actually performs two separate operations:
- First it synchronises it’s local copy of the indexes from each repository that it knows about.
- Next it checks every package that has been installed against the latest versions in the repositories, and if necessary updates it’s own installation to match that in the repository. If you are used to MS Windows, then you may be pleasantly surprised at how quickly this all completes.